|
In the past few classes, we learned how to use the Pen Tool on Gravit. The Pen Tool is mostly used to trace images, or crop certain elements of them out. The Pen Tool can also be used to make custom shapes as well. First, we were assigned to trace a collection of superhero logos. The work that I did is shown in the first image down below. Then, we were to trace Abraham Lincoln off of the standard American penny and use Lincoln's head to make a black silhouette. Our final assignment was to find two or more different images on the internet and cut them out to make one unique image. I used different coastal images to create an image of sea creatures above the sea line and boats and seagulls under the sea line. One problem I encountered was that the connected paths would curve in strange and unintended ways. I used the sub-select pointer to re-establish the intended curves, and, in the end, everything ended up appearing the way I planned. I used these links: Sunset, Sea, Turtles, Clownfish, Sailboats, Seagulls. 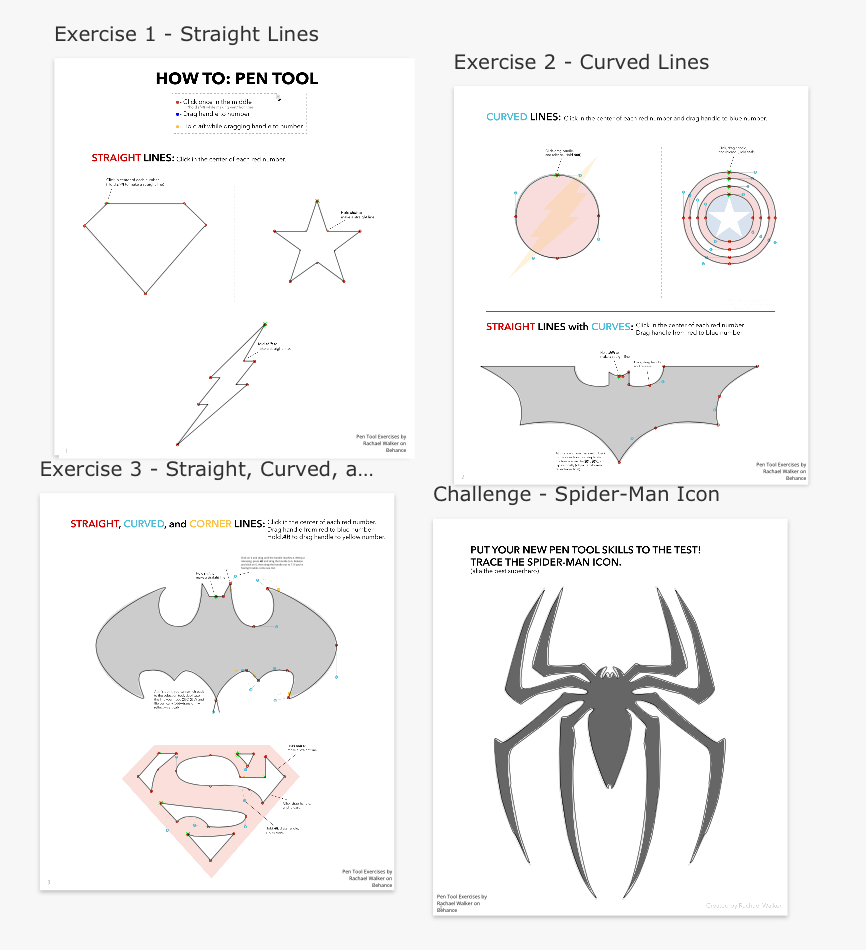  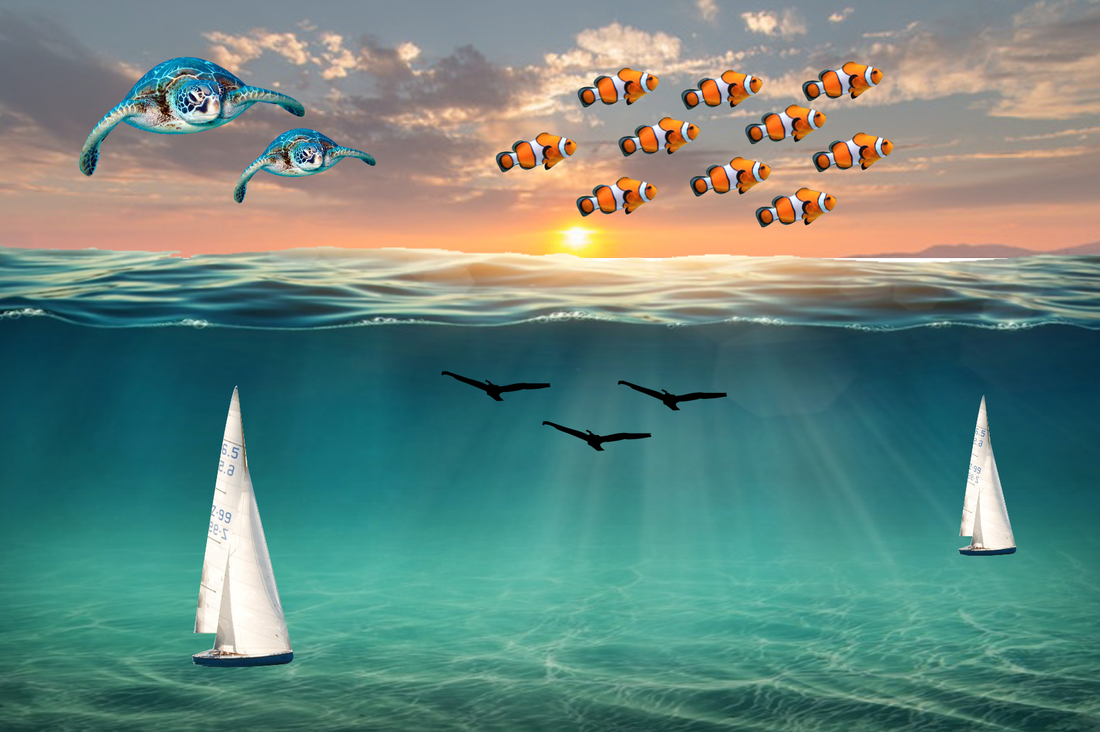
0 Comments
Today, we were assigned to use what we knew about creating shapes in Gravit and create a complex and unique illustration that portrayed something meaningful to us. We were only allowed to use a certain six shapes, and the other shapes that were needed to create this image were shapes that were converted into paths, which lets you modify the shape's points, curves, and angles. This illustration is important to me because I really enjoy art, and the original painting, which I used for reference, was the first ever painting that I duplicated when I was nine or ten years old. You can check out the original painting using this link: Lilacs and Roses by Edouard Manet. 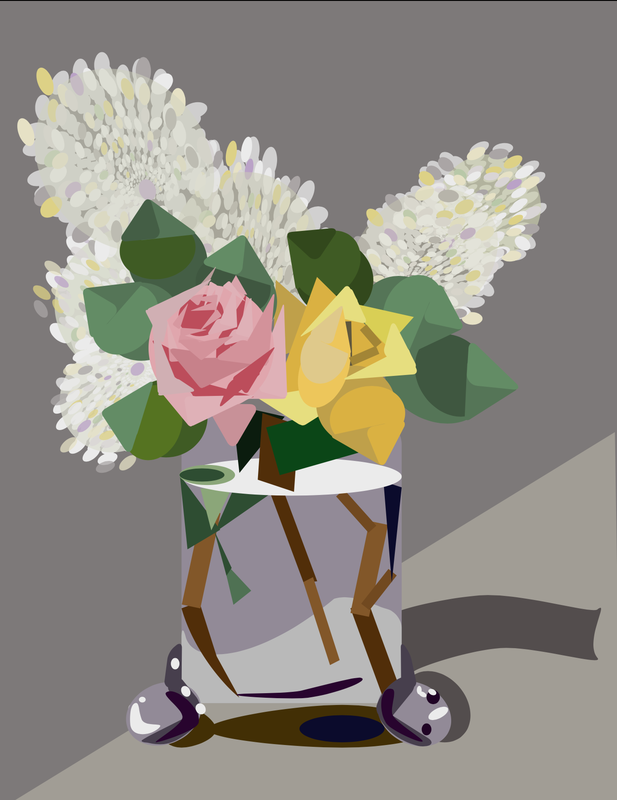 In today's class, we learned how to edit the corners of shapes to make them as round or sharp as we wanted using Gravit. The higher numerals in the corner setting make a more circular shape, which the lower numerals have a more sharp-cornered shape. I practiced this with squares, triangles, polygons, and stars. After, I created two shapes and copied and pasted them. I used the four different merging tools: union, subtract, intersect, and difference. 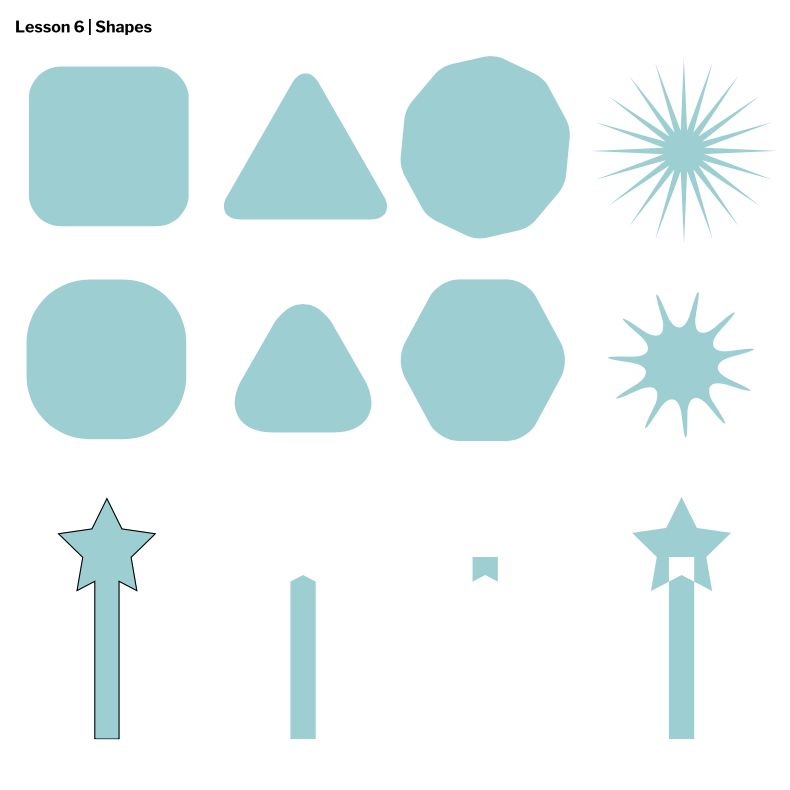 Today, we learned how to use layers and groups in Gravit. Layering was helpful in the sense that I could easily control which shapes I wanted to be in front of others, which was something I already knew a little bit about from using Google Slides. Grouping made the left-hand sidebar more organized, as we could see all the elements but in certain categories with other elements. Aligning made everything exact and parallel to edges or the center of a page. 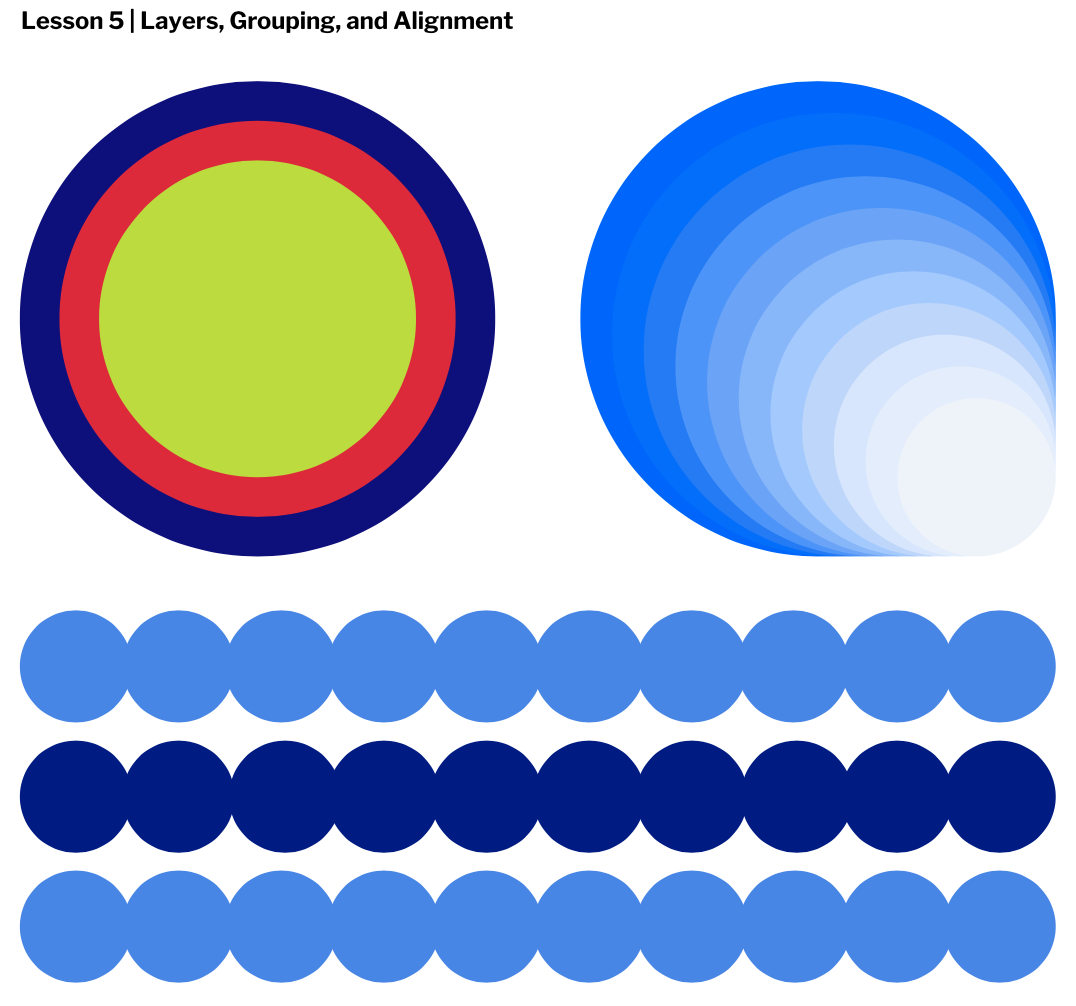 Today, we learned how to fill and border shapes in Gravit. "Fill" is to change the color or opacity of the shape. "Border" is when we apply a border that surrounds the shape with a certain color of your choice and thickness. The borders can be dashed, and a border can even be applied and made invisible. I used the fill tool to make my shapes different shades of blue, and I used the border tool to make black borders around my shapes.  This technology class, I learned how to use code to create various different shapes that assembled a picture. I used my shapes to create the image of an owl. I used a "fill" code to color my shapes. Different components in the shapes let me move the shapes, change their angles, and modify their positions. I used KhanAcademy tutorials to help me better understand how to draw with code (feel free to try them yourself!). I learned more about how using certain commands when coding shapes was more closely related to math than I thought, specifically, geometry. Everything that was on used for the drawing was on the first quadrant of a coordinate plane, which made it easier for me to understand how to get the code to draw shapes where I wanted them to be. 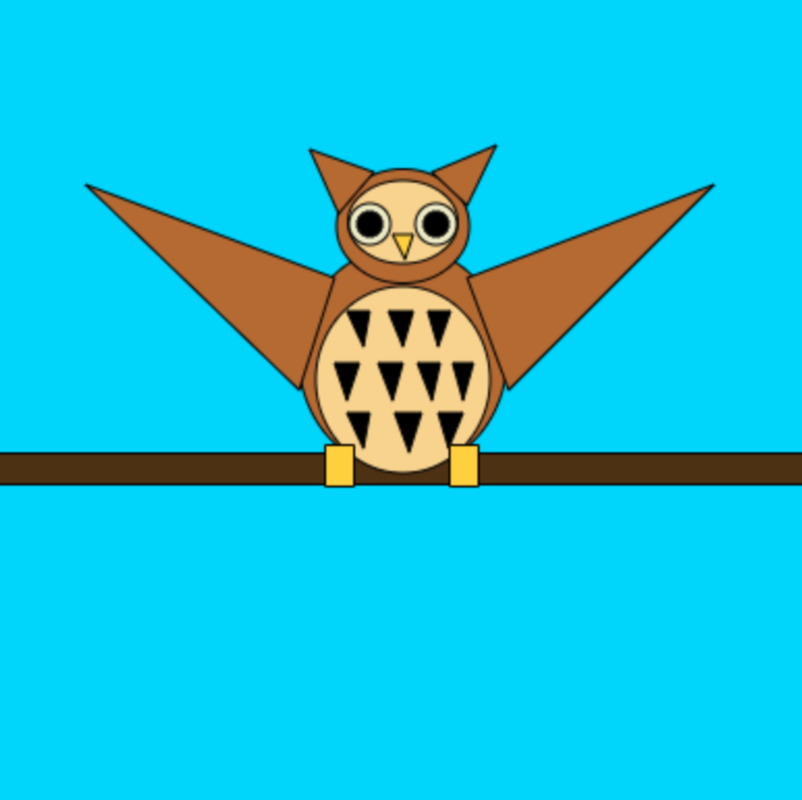 |
AuthorHi, I'm Hannah. I'm writing a blog for Technology Class. Archives
May 2021
 This work is licensed under a Creative Commons Attribution-NonCommercial-NoDerivatives 4.0 International License. |
 RSS Feed
